

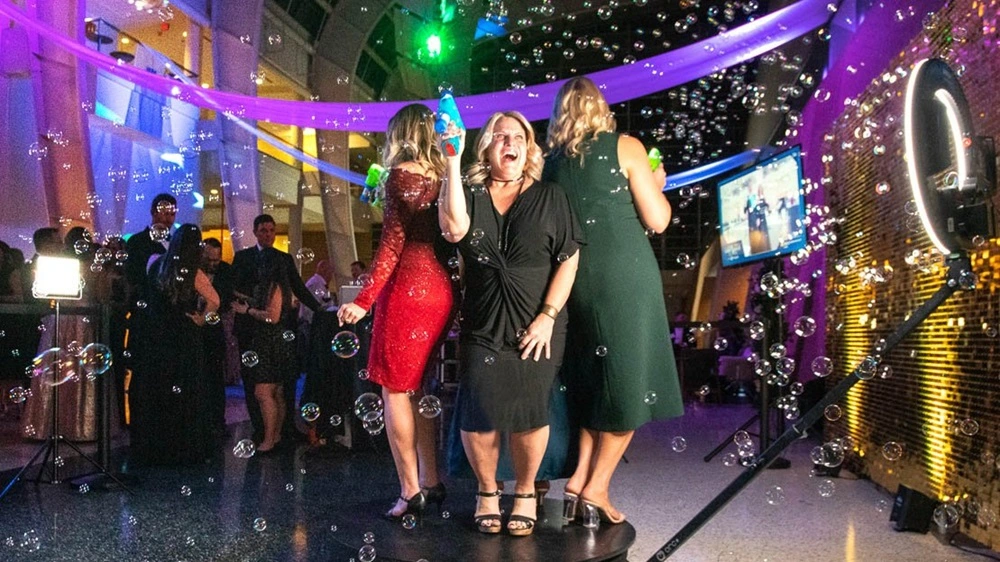
In the digital age, experiential marketing and social sharing dictate the success of nearly any public or private gathering. Whether you are throwing a corporate product launch, a high-end wedding, a charity gala, or a milestone birthday party, attendees expect an interactive space dedicated to capturing memories. A poorly lit corner with a generic vinyl banner simply does not cut it anymore. Designing a truly Instagram-worthy photo booth requires a strategic blend of interior styling, professional lighting techniques, tactile textures, and seamless digital integration.
Building an interactive visual experience transforms casual attendees into active brand ambassadors. When guests snap a striking photo and share it across their social media profiles, they provide organic visibility that extends far beyond the physical venue walls. Achieving this level of engagement means looking beyond basic props and focusing on creating a cohesive environment that tells a visual story. This guide walks you through every essential step required to design, construct, and execute a stunning photo booth that dominates social media feeds.
1. Selecting the Right Location and Footprint
The physical placement of your photo booth dictates whether it becomes the beating heart of your event or an ignored afterthought tucked away in a dark corner.
-
Prioritize High-Traffic Zones: Position the installation near the main entrance, adjacent to the cocktail bar, or along the natural flow of foot traffic. If guests have to hunt for the booth, engagement rates will plummet.
-
Assess Spatial Requirements: Ensure you have ample room not just for the backdrop and the camera equipment, but also for a queue of waiting participants. A cramped space creates bottlenecks and discourages people from stepping up.
-
Control Ambient Light Interference: Avoid placing your booth directly in front of glaring windows, harsh overhead fluorescent tubes, or flashing disco lights that can ruin exposure levels and wash out photographs.
2. Crafting a Captivating Backdrop
The backdrop serves as the emotional and visual anchor of your entire setup. It must capture attention instantly while remaining visually balanced through a camera lens.
-
Play with Tactile Textures: Flat printed backdrops often look cheap on camera. Instead, incorporate multidimensional elements such as lush faux-floral walls, stacked boxwood hedges, geometric wooden panels, or cascading fabric drapery.
-
Integrate Branded Subtlety: If you are hosting a corporate event, avoid slapping a giant corporate logo dead center like a billboard. Weave branding subtly into the pattern, or use a neon sign featuring a catchy campaign hashtag instead.
-
Consider Depth and Layering: Create visual depth by placing props or furniture slightly forward from the main backdrop wall. This prevents photographs from looking flat and gives subjects room to move naturally.
3. Mastering Professional Lighting Techniques
Even the most expensive camera equipment and the most stunning backdrop will yield disappointing results if the lighting is flat, harsh, or uneven.
-
Invest in Diffused Softboxes or Ring Lights: Hard direct flash creates harsh facial shadows and unflattering glare. Use softbox studio lights positioned at forty-five-degree angles on either side of the camera to evenly illuminate faces.
-
Experiment with Neon and LED Accents: Glowing LED strips, custom neon typography, or backlit acrylic panels add a modern, moody aesthetic that photographs exceptionally well in low-light indoor environments.
-
Avoid Backlighting Traps: Ensure that light sources are never positioned directly behind your subjects unless you are intentionally trying to create a dramatic silhouette effect.
4. Curating Smart Props and Interactive Elements
Props can elevate a static photo station into a genuinely playful experience, provided they do not cross the line into clutter and chaos.
-
Ditch Cheap Plastic Novelties: Flimsy cardboard cutouts on wooden sticks often bend, break, and look messy within the first twenty minutes of an event. Opt for durable acrylic signs, custom felt letterboards, or high-quality wearable accessories.
-
Align Props with the Event Theme: If you are hosting a vintage-themed gala, provide classic telephones, vintage hats, and antique suitcases. Keep the selection focused so it supports the overarching aesthetic.
-
Keep Surfaces Clean and Organized: Designate a dedicated side table or shelf to hold props neatly between uses. A messy pile of clutter discourages guests from picking things up.
5. Streamlining Digital Sharing and Instant Tech
An aesthetic photo means little if guests struggle to get the digital file onto their personal phones before leaving the venue.
-
Incorporate Instant Sharing Stations: Set up an iPad-based sharing kiosk that allows users to instantly text or email high-resolution GIFs, boomerangs, and static photos directly to their mobile devices.
-
Pre-Set Custom Overlays: Design a custom digital border or graphic overlay featuring the event name, date, or hashtag that automatically applies to every photo taken at the booth.
-
Ensure Stable Internet Connectivity: Relying solely on venue Wi-Fi is risky. Always have a dedicated mobile hotspot backup to ensure upload queues never stall during peak usage times.
Frequently Asked Questions
How much space do I need to build a functional photo booth?
As a general rule of thumb, allocate a minimum space of eight feet wide by eight feet deep. This provides enough clearance for the backdrop, the camera tripod, tall lighting stands, and a comfortable distance for groups of three to four people to stand together.
Is it better to hire a professional photographer or use an automated booth?
Both options have distinct merits. Automated digital booths allow for instant sharing and endless fun without human fatigue. Hiring a professional photographer with studio lighting adds an artistic touch and ensures superior image quality, though digital delivery times may take a few days.
How can I prevent the photo booth area from becoming a permanent bottleneck?
Manage traffic flow by placing the booth away from narrow doorways or food service lines. Additionally, having a friendly attendant stationed nearby can keep the line moving smoothly, encourage shy guests, and help keep props organized.
What are the best colors to use for a photo booth backdrop?
Matte neutral tones, deep jewel tones like emerald and navy, and earthy pastels photograph much better than stark white or glossy reflective surfaces. Avoid overly busy micro-patterns that create digital moire patterns and visual distortion through camera lenses.
How do I encourage guests to actually use the photo booth hashtag?
Display the official hashtag clearly at eye level within the booth setup. You can paint it on a small wooden plaque, project it subtly onto the side wall, or include it on the digital photo sharing screen to remind users before they post online.
Can I set up an outdoor photo booth successfully?
Outdoor setups are stunning but require extra planning. You must account for potential wind gusts that can knock over backdrops and lighting stands, protect electronics from unexpected moisture, and use heavy sandbags to anchor every piece of equipment safely.
How do I maintain lighting consistency throughout a day-to-night event?
If your event transitions from natural daylight into a dark evening setting, automated studio lighting with adjustable color temperatures is essential. Using artificial strobe or continuous LED softboxes ensures that your lighting conditions remain completely independent of ambient outdoor changes.

Comments are closed.